

Configuring an iOS certificate to use with PhoneGap can be a bit tricky the first time around, but if you follow this step-by-step guide, you should be up and running in no time.
The Ingredients
Before we can start creating iOS applications, you will need four things: (1) You need to have a physical device, and you will deploy the app to this device. (2) This means that you will need to be enrolled in the iOS Developer Program, since you will be deploying the app on a physical device. Visit Apple’s developer website for more information about the iOS Developer Program. (3) Besides a developer account at Apple, an account at Adobe is required as well, since we will be using the Adobe PhoneGap Build service. Accounts at Adobe are free and easy to set up; visit the PhoneGap Build website for further instructions. (4) This guide uses the built-in application Keychain Access to request a certificate, which means we will need a Mac.
Step 1: Requesting a Development Certificate
The first step in setting up a development environment in PhoneGap is requesting a development certificate from Apple:
A development certificate identifies you, as a team member, in a development provisioning profile that allows apps signed by you to launch on devices. [App Distribution Guide]
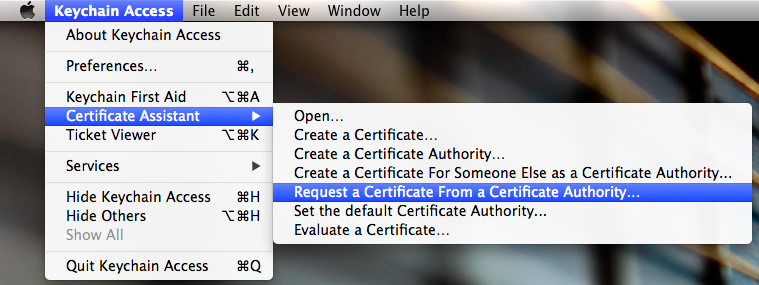
Open Keychain Access and select Certificate Assistant > Request a Certificate From a Certificate Authority… from the Keychain Access menu.
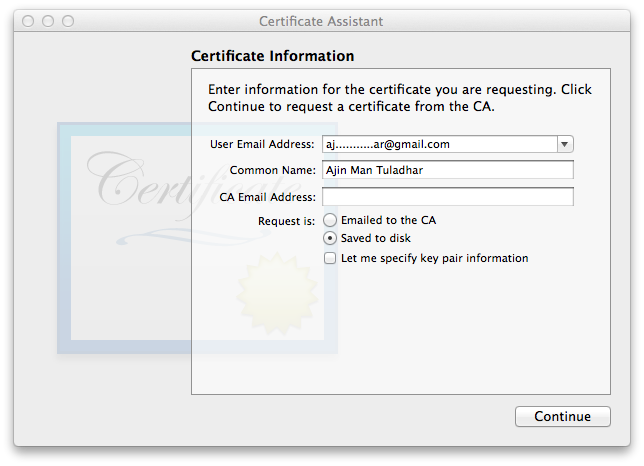
Enter a user email address and a common name. Leave the CA email address field empty and select Saved to disk to create a ‘certificate request’ file. Click Continue within Keychain Access to complete the certificate request process and save the certificate request to your hard drive. You will now have a file named CertificateSigningRequest.certSigningRequest.
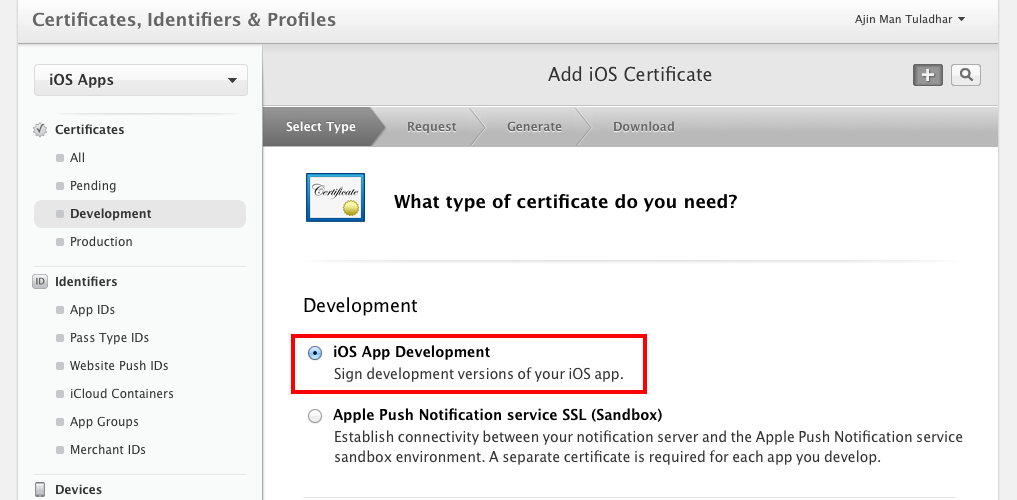
We will be using the certificate signing request file to create a certificate issued by Apple itself. This requires an iOS developer account for Apple! Log in to developer.apple.com and select “Certificates, Identifiers & Profiles”. This will bring you to a page with the following options: Certificates, Identifiers, Devices and Provisioning Profiles. If you have not set up an identifier yet, click on Identifiers and follow the instructions on the screen. Select the Certificates option to see a list of all the certificates issued to you. To add a new certificate click on the plus sign (+) and select iOS App Development and click Continue.
On the “About Creating a Certificate Signing Request (CSR)” page, click Continue since we created a certificate signing request file in the previous step. On the “Generate Your Certificate” page, click Choose File and browse to the location of the certificate signing request file. Click Open then confirm the upload by clicking Generate. It may take few moments to generate the certificate.
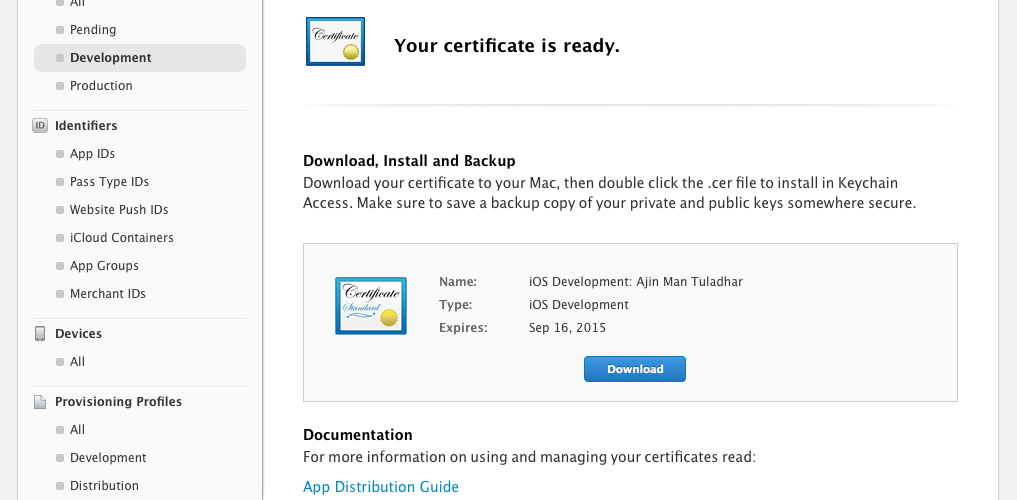
Follow Apple’s instructions and Download the generated certificate and install it in Keychain Access by double clicking on the downloaded file. This will automatically import it into Keychain Access under Certificates.
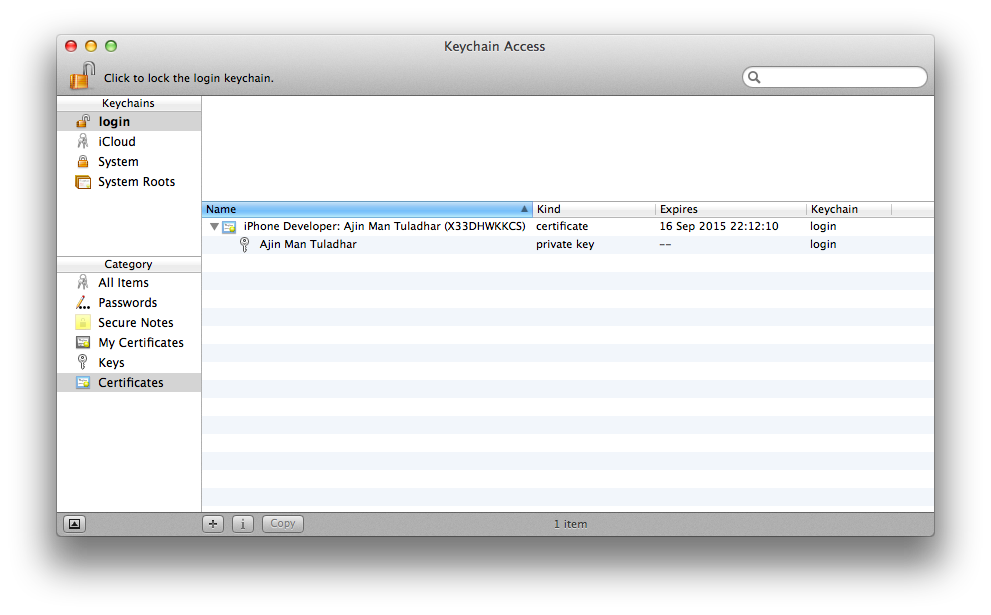
Building an app in PhoneGap requires two files: a personal information exchange file also known as a p12 file and a mobile provisional file. Open Keychain Access > Certificates and right click on the installed certificate downloaded from Apple and choose Export. Save your certificate in the personal information exchange (p12) file format.
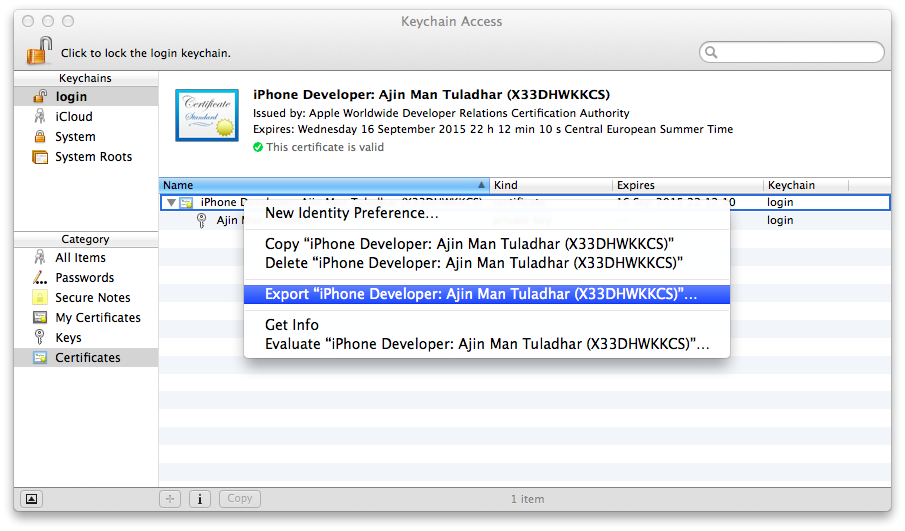
You will be asked to create a password that is used when you use the certificate to sign applications, which we will use later in PhoneGap. Keychain Access will ask you to enter your system account password to allow it to export the certificate from your keychain.
Step 2: Provisioning Files
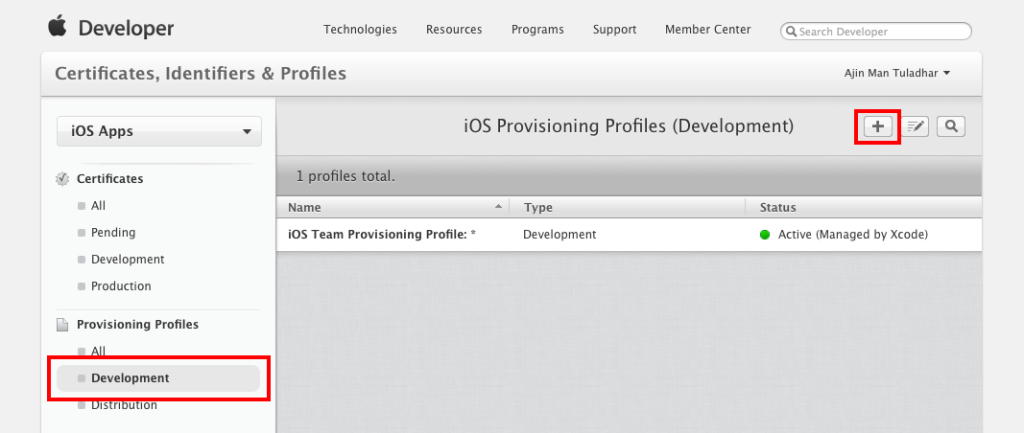
Before we can head to PhoneGap, we will need to have provisioning profiles, which basically associate the devices you have listed in the provisioning portal with the certificate signed by Apple. In the iOS Development Center, select the “Development in the Provisioning Profiles” section. Click the plus button at the top right and again select iOS App Development under the Development section to create a provisioning profile so that you can install development apps on assigned test devices.
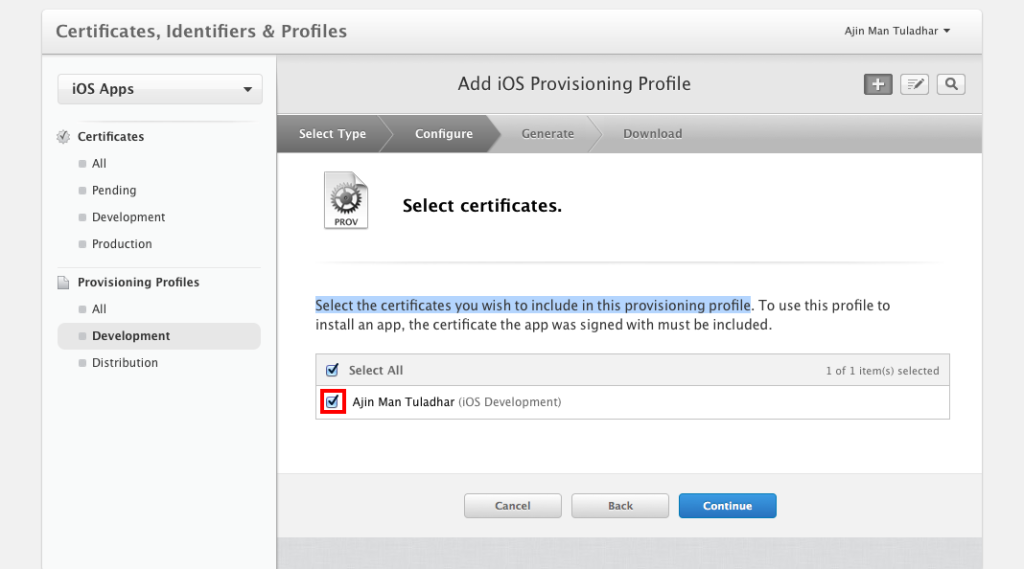
Click Continue and select your app ID from the list. Select the certificate you want to include in this provisioning profile, which was the one newly created in the previous steps, and then click Continue.
On the next page, we will select the devices that need to be included in this provisioning profile. Select your device and click Continue. Provide a name to identify your provisioning profile and click Generate.
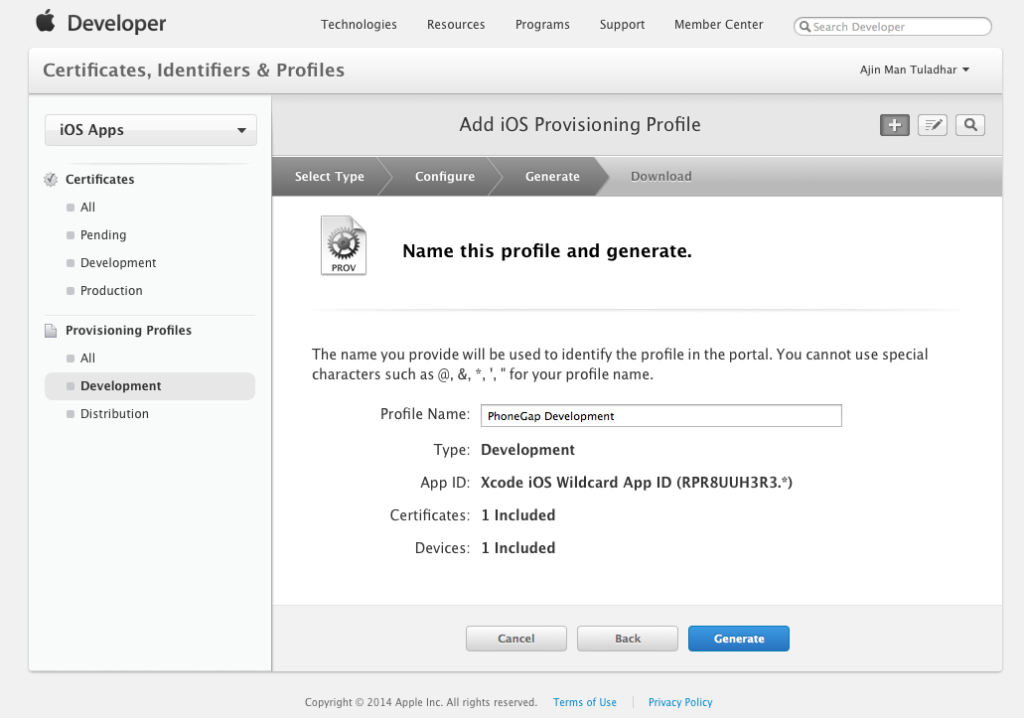
On the next page, you can download the newly created provisioning profile with a file extension of mobileprovision.
Step 3: PhoneGap, Here We Come
Log in to build.phonegap.com and go to Account > Edit account> Signing Keys. This page is used to manage all your keys. It consists of certificate and provisioning profiles, for specific environments.
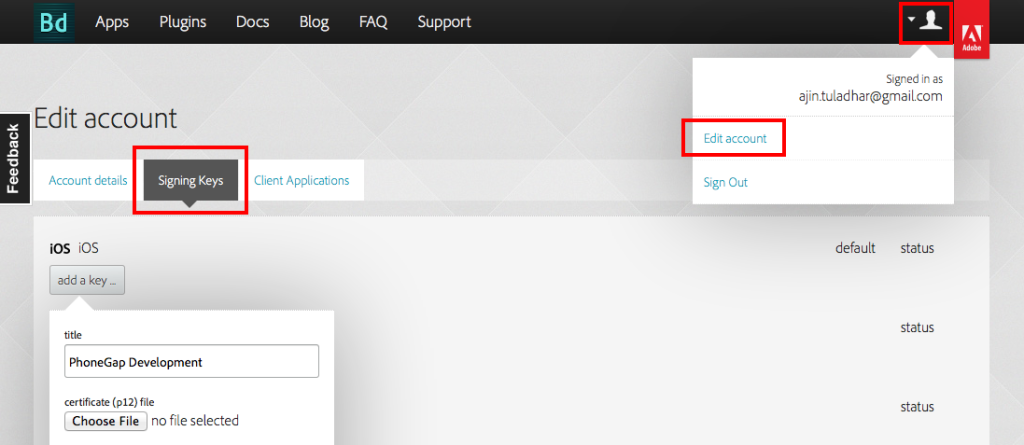
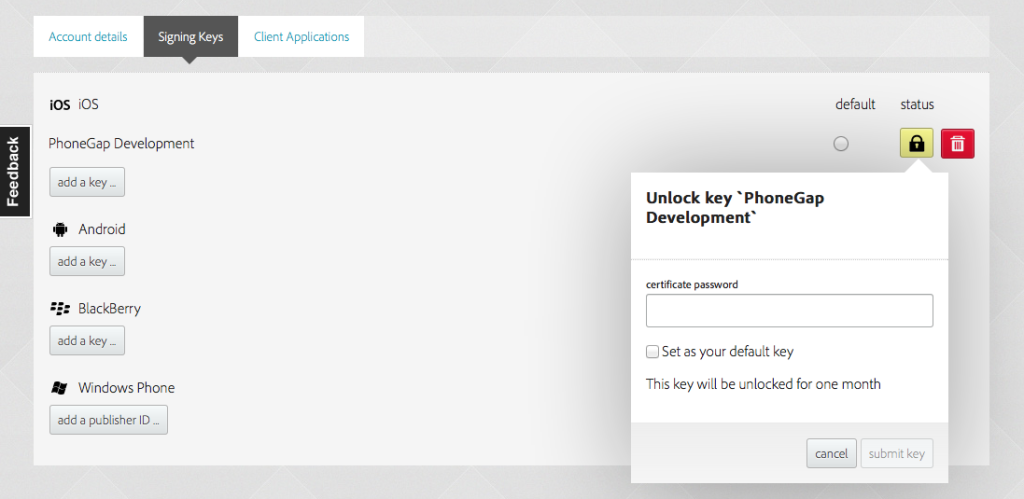
Click on add a key and provide a friendly title or name for the key. Upload the generated personal information exchange and provisioning profile files with extensions mobileprovision and p12 and click submit. On the same signing key page, notice your newly added key. Now click on the key lock icon of the newly created key and enter the passphrase that you chose during https://buycbdproducts.com creation of the p12 file.
Now you are ready to build with PhoneGap!